Game Haven Guild Store Guide
Game Haven Guild helps you manage the community side of your store—from events and reservations to memberships, communication, and community insights. Use as much or as little as you need. Start with the tools that solve your biggest challenges today, then add more as your store and community grow. There’s no need to change everything at once.
This guide walks you through setup, explains how each feature works, and helps you get the most from Game Haven Guild—at your own pace, on your terms.
Start Here
Welcome to Game Haven Guild!
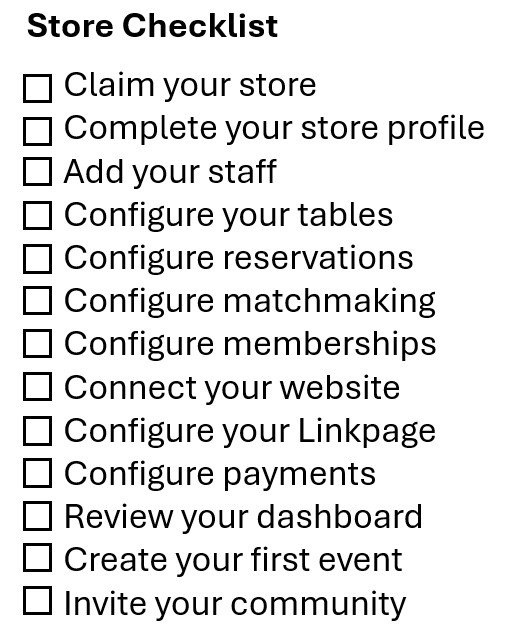
Getting started is simple. Follow the checklist to set up the essentials, connect your store, and get your community ready to engage.
Start with what you need today and add more as you go.
Claim Store
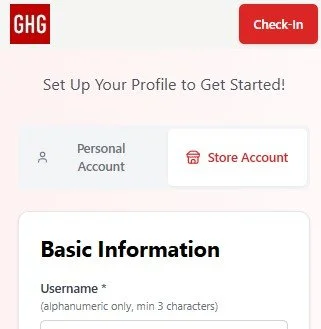
When setting up your account in the Game Haven Guild app or online at www.gamehavenguild.app, create your username and password, then select create a Store Account.
Follow the prompts to enter your store information and complete the required fields to get started.
Complete Store Profile
After creating your store account, you can add more details and refine your store information at any time.
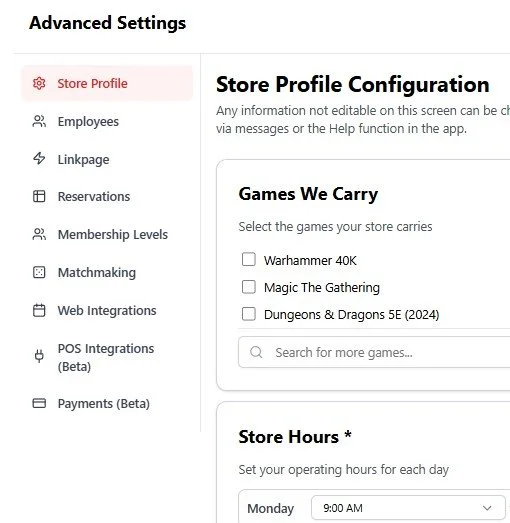
Go to Menu → Manage Store → Advanced → Store Profile to update your profile and add additional information.
The Advanced Settings menu is also where you’ll find the rest of your store configuration options, allowing you to customize Game Haven Guild to fit the way your store operates.
Manage Employees
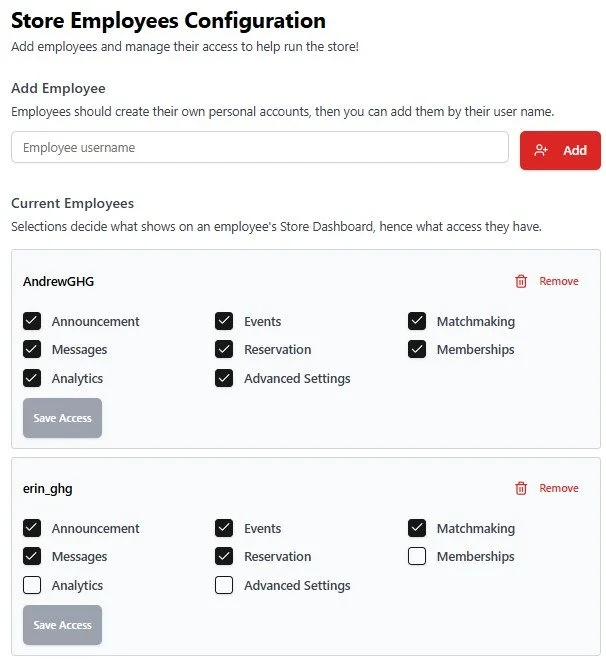
Have each employee create their own personal Game Haven Guild accounts using their own username and password. Once their account is created, you can add them to your store by searching for their username under Employees in Advanced Settings.
Once assigned to your store, Manage Store will appear in their menu, giving them access to the tools and features you choose to allow.
For trusted team members, you can grant Advanced Settings access. This provides access to the store’s configuration options, similar to the store owner, while protecting the owner account from being removed or having its ownership access changed.
Configure Tables
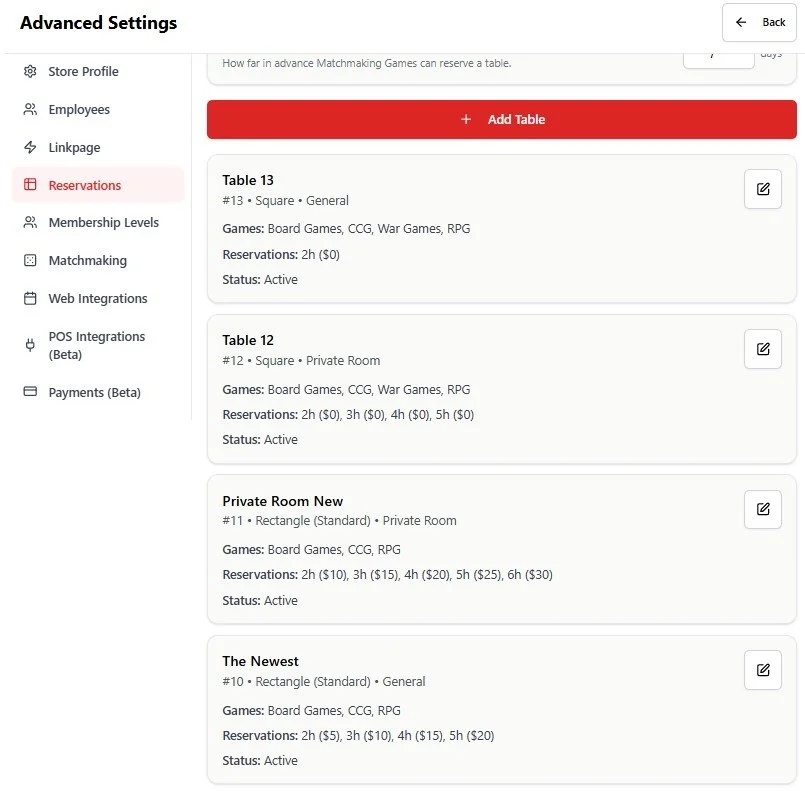
Set up the tables and gaming spaces your community can reserve. From Advanced Settings → Reservations, select the red Add Tables button to create each table and configure its details.
Specify which game categories can be played at the table, the number of players it can accommodate, and the reservation time periods and pricing you offer.
You’ll need to configure at least one table before reservations can be enabled for your store.
Configure Reservations
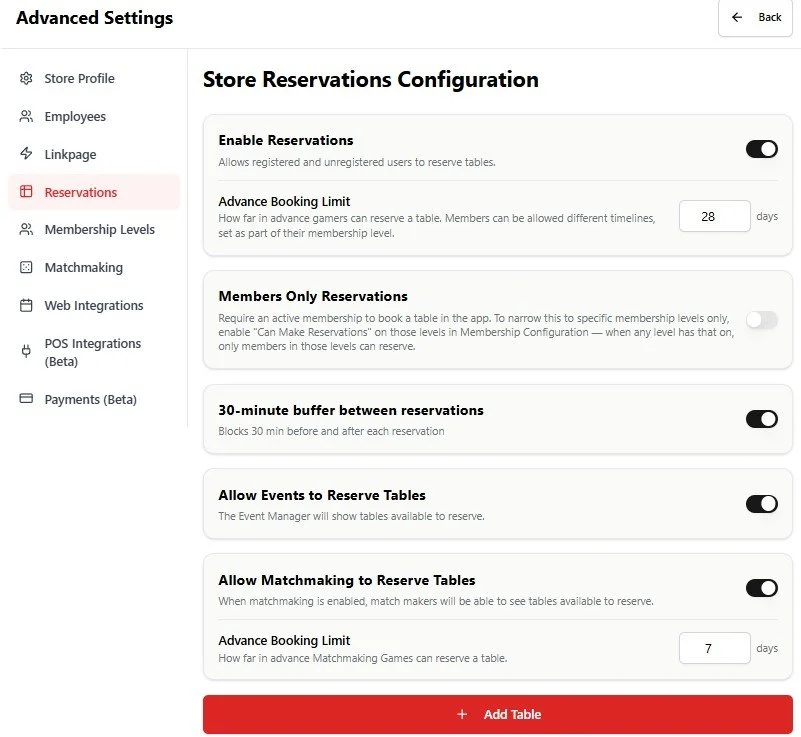
Customize how reservations work for your store—or leave them off if you don’t offer reservations today. Simply keep the Reservations toggle disabled until you’re ready to use them.
When enabled, you can set how far in advance customers can book, add a buffer between reservations to give staff time between bookings, and choose whether events you create can reserve tables.
You can also decide whether gamer-created matchmaking sessions can reserve tables, giving your community an easy way to organize games while helping you manage table availability.
Configure Matchmaking
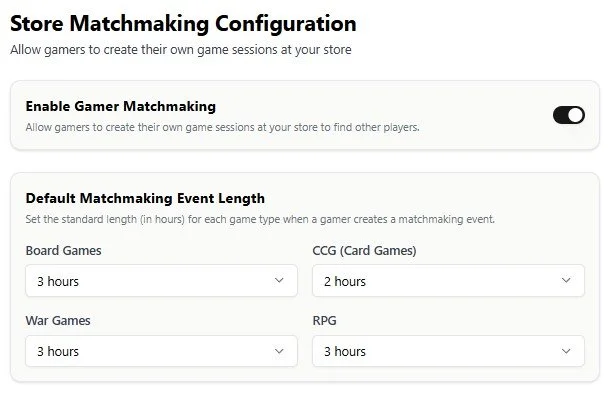
Enable matchmaking to let your community create their own gaming sessions around your events. When enabled, a Host button appears on event pages in the app, allowing gamers to create a matchmaking session that other users can discover on your event calendars.
You control how matchmaking works by setting a default session length for each game type, helping keep sessions organized and preventing them from remaining open indefinitely. On the Reservations configuration page, you can also choose whether gamer-created matchmaking sessions should reserve a table automatically.
Configure Memberships
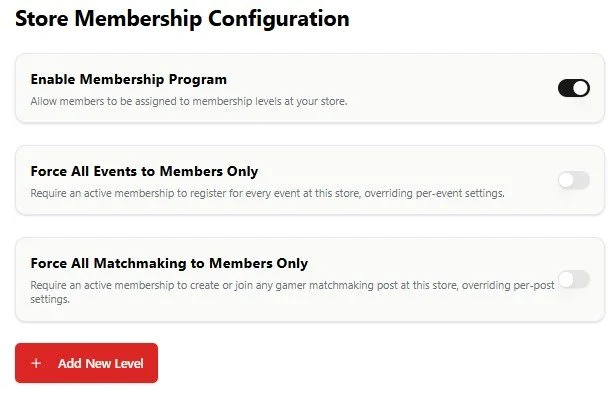
Create a membership program that fits the way your store operates—from casual loyalty programs to strict members-only communities. You can require an active membership to register for events or create matchmaking sessions, while offering different membership levels with their own benefits and access.
Give members perks such as early access to reservations, first access to event registration, members-only activities, or shared memberships that can be extended to other users. Each membership level can have its own monthly and annual pricing, giving you the flexibility to build the program that works best for your store.
Connect Your Website
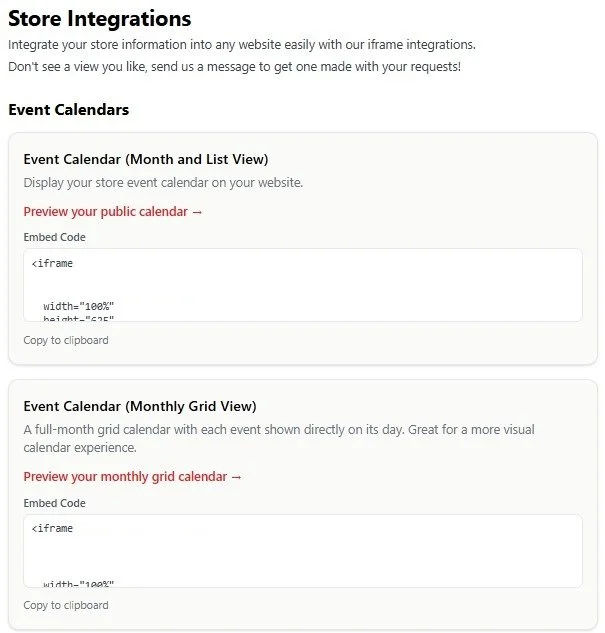
Bring Game Haven Guild directly into your existing website with simple, low-code iframe integrations. Connect your event calendar and reservation bookings without having to rebuild your website or maintain duplicate information.
Choose from different display formats to match your website and give customers a seamless way to discover events, register, and reserve tables—while you continue managing everything through Game Haven Guild.
Configure Your Linkpage
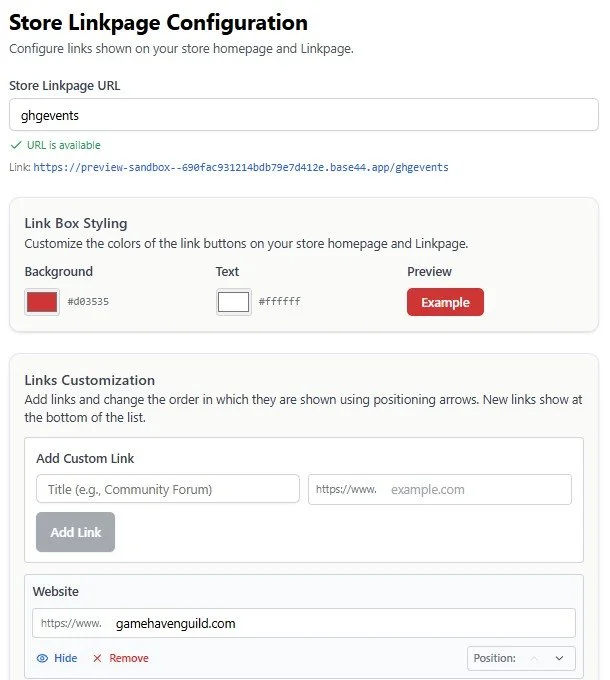
Your store name automatically creates a unique Linkpage URL, which you can customize to better fit your store. Personalize the page with your own background and button colors, then add, remove, and rearrange links to highlight what matters most to your community.
Your Linkpage is also connected to your store’s About section in the Game Haven Guild app, so the same information is available to your community wherever they find your store.
Configure Your Payments
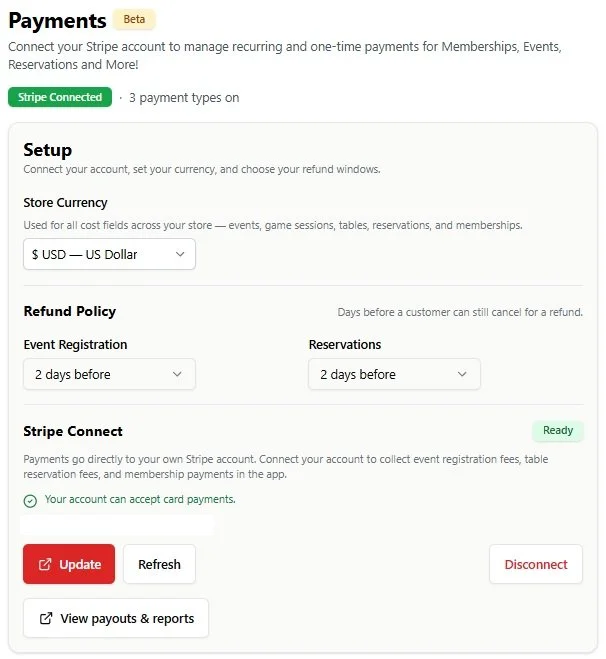
Game Haven Guild offers optional payment processing through Stripe Connect, giving you the flexibility to collect payments for Event Registration, Reservations, Memberships, or any combination of the three.
Using your own Stripe account, you remain the merchant of record. Game Haven Guild never holds your money or takes a fee from your transactions. Payments are processed directly through your Stripe account and are subject only to Stripe’s applicable processing fees.
You can enable payments for one, two, all three, or none of these features—so you only use payment processing where it makes sense for your store.
COMING SOON!
Review Your Dashboard
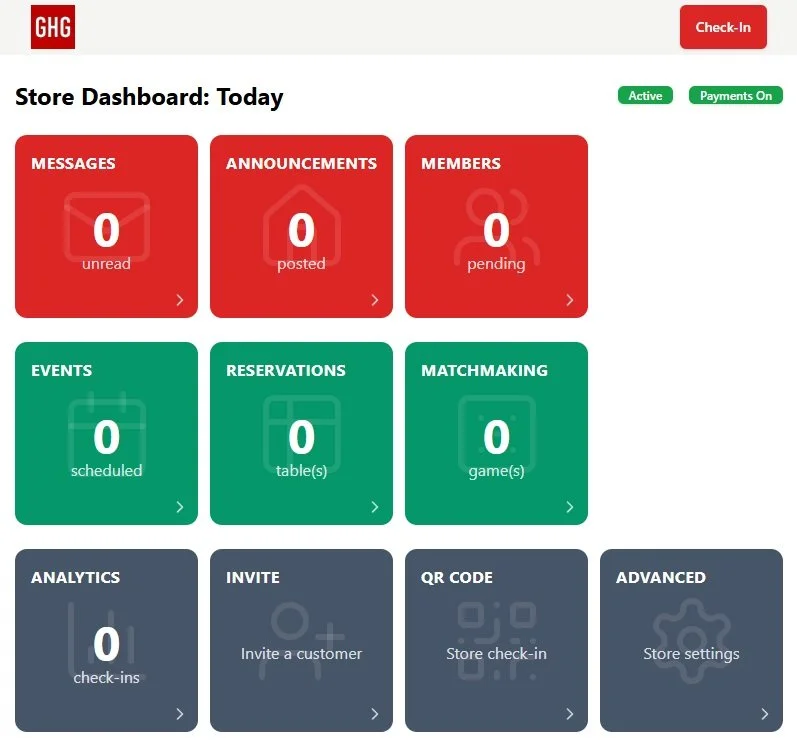
Now that your store is configured, view your store dashboard from Menu → Manage Store.
Your Store Dashboard is your central hub for managing Game Haven Guild. Urgent items will be highlighted when they need your attention, while quick-access tools put your events, reservations, community activity, and other key features right at your fingertips.
Make the dashboard part of your daily routine to quickly see what’s happening and take action when needed.
Create An Event
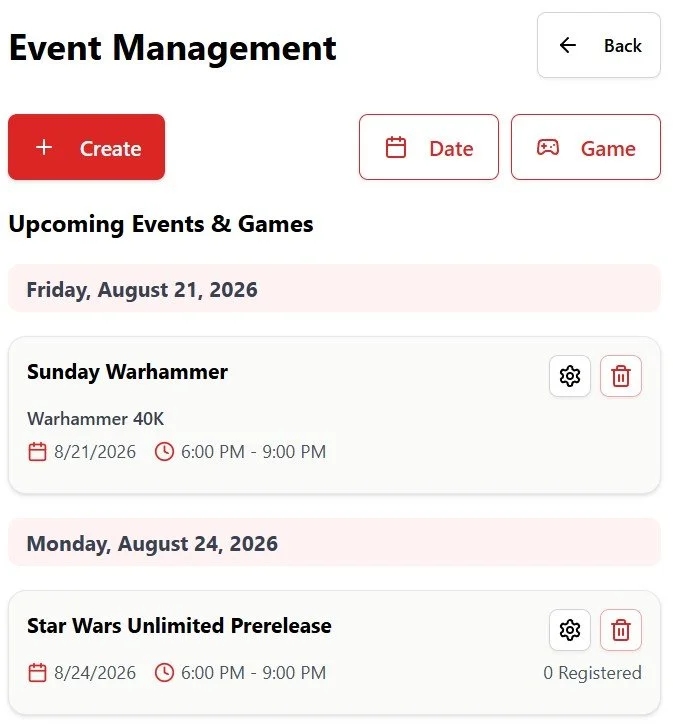
It’s time to create your first event! From the Store Dashboard, select Events, then choose Create on the Event Management page.
Add the game, configure registration and game tracking where applicable, and set your schedule as a one-time or recurring event. You can also reserve tables for the event as part of the setup if they are configured.
Once published, your event will automatically appear across your Game Haven Guild app profile, Linkpage, and website integrations, giving your community multiple ways to discover and register.
Invite Your Community
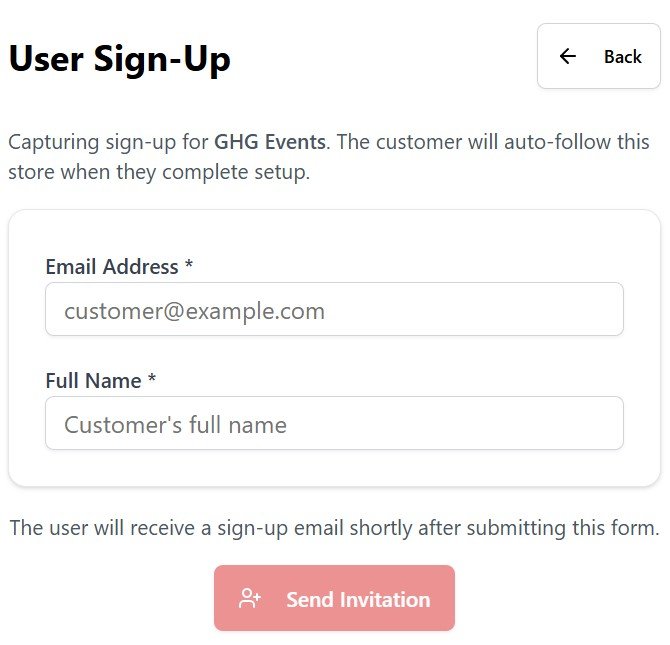
Start connecting with your community by using the Invite button on your Store Dashboard to send email invitations to your customers. When they sign up through your invitation, they’ll automatically follow your store and see your store homepage first when they use the app.
It’s an easy way to bring your existing community into Game Haven Guild and give them one place to discover your events, reservations, updates, and more.